WordPress – Inserting images using the media manager
13th January 2016
This blog will explain the simple process of inserting an image into your post or pages in WordPress.
When inserting an image it’s a good idea to first place the cursor where you want the image to appear by clicking into the content area first.
Uploading
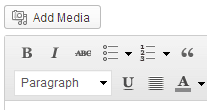
To upload and insert your image click the button on the left hand side just above the tool-bar labelled Add Media.

This will open the Media Library where all the images are stored that appear on your website. You will see the option to Upload images.

This allows you to browse your PC and select the images to be uploaded. By holding Ctrl on your keyboard whilst selecting files you can select multiple files in one go.
Once you have selected your file(s) you will see it uploading in the main media library window.
Inserting
Inserting an image is simple. Simply click on the image, a tick will appear in the top right corner to show its selected and you can use Ctrl again to select more than one.
On the right hand side there are some optional fields to fill in. As a minimum you should fill in the image alt text field with a short description of the image.
Finally change the Link to dropdown box to None and click Insert.
